
 10. Slide Show - Make a Slide Show file
Step 1
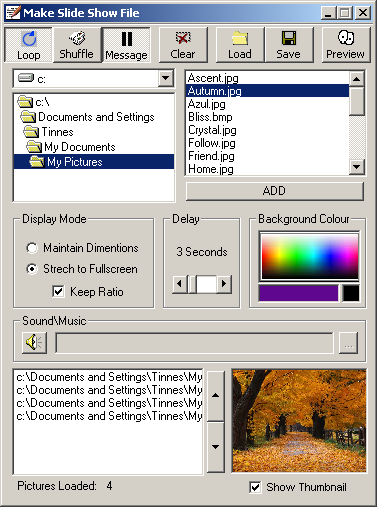
Start the program and click on "Make Slide Show File". You will see the following screen:
Step 2
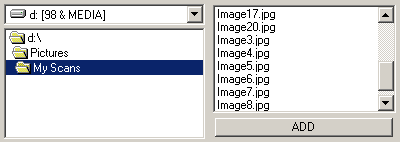
The first thing to do is navigate to the folder containing the images you want to use. First select the drive, in this case it's 'd: [98 & MEDIA]'. Then you can browse the drive using the directory box below. You'll notice that if you click on a folder containing compatible picture files, they will be listed in file box on the right.
Step 3
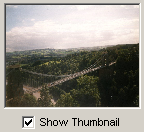
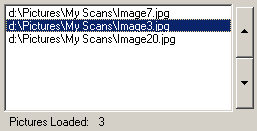
When you click on a filename in the file list box a preview of the image will be displayed in the bottom right corner of the program.
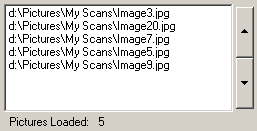
If you want to add that image to the show, then you can either double click it or when it's selected click on the 'ADD' button. This will add it to the list of loaded pictures in the bottom left hand of the program. You can keep repeating this process, getting pictures from different directories until you have all the images loaded you want.
Step 4
If you are not happy with the images you have loaded in, you can remove them by double clicking on the name in the loaded image list. You will then be asked to confirm the operation. If you want to erase all of the items in the loaded images list, you can use the 'Clear' button on the toolbar.
You can also change the order of the images by selecting a file and clicking on the up and down arrows on the right.
Step 5
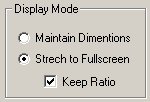
Now you need to set the other options of the Slide Show. First is the 'Display Mode', there are three different ways to show the images.
Maintain Dimensions - This basically mean the images will be displayed exactly how they are. So if you have a tiny picture then it will appear in the centre of the screen with space around it. If you have a big picture it could go off the edges of the screen.
Stretch to Fullscreen - This option will just take the image and make it fill the whole screen. This completely ignores the aspect ratio of the picture so most of the time your pictures will look out of proportion.
Stretch to Fullscreen and Keep Ratio - This option is the most common. It tries to make the picture fill the screen while still keeping aspect ratio so the picture doesn't look distorted.
Step 6
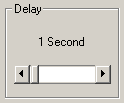
Now you have to decide how long you want each picture to be displayed for. This can be between 1 and 60 seconds. You can also set the delay to "Forever" which means you control when the next picture is shown using the hotkeys. This might be useful for presentations etc.
Step 7
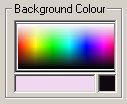
If the display mode is anything other then 'Stretch to Fullscreen' then the background will always be partially showing. Here you can set the colour you want to use. The selected colour is the one is the bottom right corner. To change it, hover your mouse over the colour pad till the colour you want comes up and left click.
Step 8
There are also some settings in the toolbar you may want to change.
'Loop' means the Slide Show will be continually repeated until you exit the program. If this isn't selected, then when the end of the list of images reached the program will automatically close.
'Shuffle' basically means the images will be displayed in a random order.
The 'Message' option is whether or not to display an indication when the show is paused.
Step 9
Once all these options are set up how you want them, click the 'Save' button to save the Slide Show.
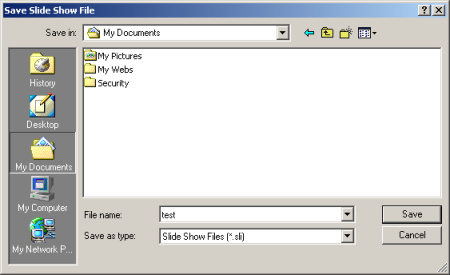
Step 10
The Save dialog box will then appear. You'll need to choose a name and location for the file then click 'Save'.
A success message will be displayed and you will be asked if you would like to run the show now. The file you've created can now be loaded in the Slide Show program at any time.