
 Version
Select which version of the calendar you have
- Desktop Calendar 7
- Desktop Calendar 0.5
- Desktop Calendar 0.4
 Contact
Can't find the answer to your question here? Contact us.
Desktop Calendar 0.5 FAQ
Importing CSV files
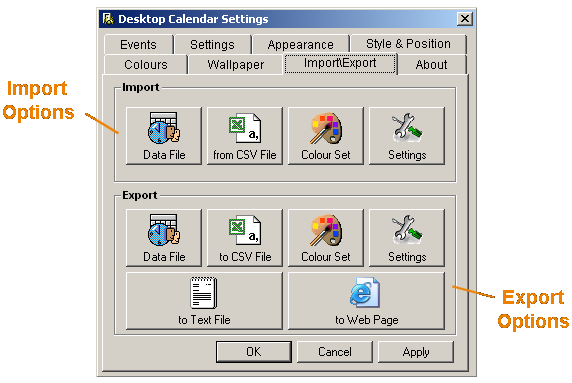
Go into the settings and click on the "Import\Export" tab. Then on the "from CSV File" button in the "Import" frame.
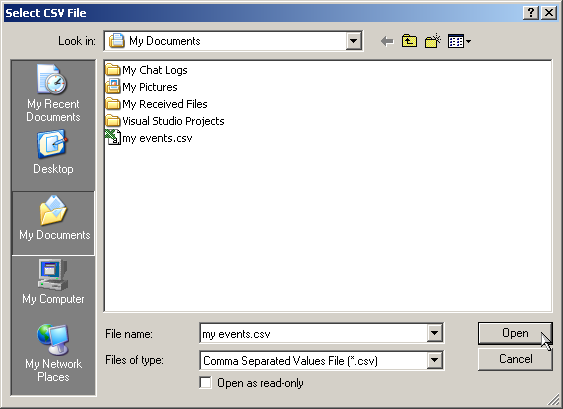
A dialog box should appear asking you to select a CSV File. When you're got one, click "Open".
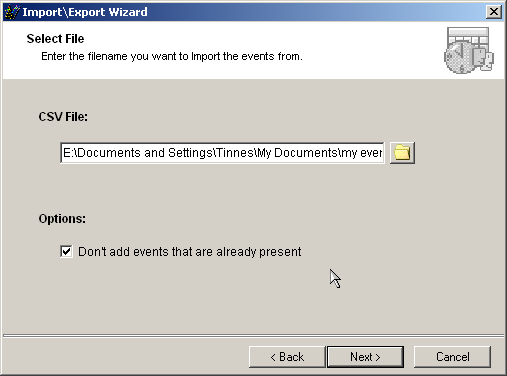
You will now see the filename you've selected and the option "Don't add events that are already present". This basically means that if there are any event that are exactly the same (i.e. doubles) then they will be ignored. It is recommended you keep this option selected. Click on "Next" to move to the next step.
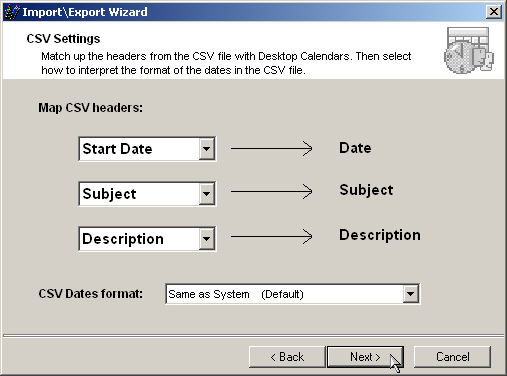
You now need to map the headers. What this basically means is you have to match up the columns in the CSV file with the corresponding fields in Desktop Calendar. e.g. Start Date -> Date, Subject -> Subject, Description -> Description. All the headers from the CSV file should be listed in the three drop down boxes. If you don't have (or want) to use the "Description" field, you can select "None". When you've finished with the headers, you need to choose how to interpret the date. If you know which format the dates are stored in select it from the drop down list at the bottom, if not, try keeping it on "Same as System". This presumes the dates stored in the CSV file matches the one used on your computer. Then click "Next".
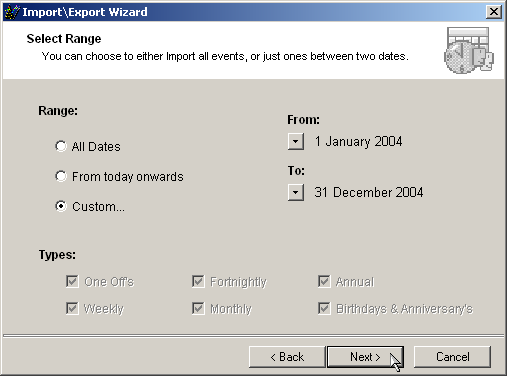
You will then be asked which dates and types of events you want to import. The date range options are pretty self explanatory. "All Dates" includes every event in the CSV File. "From today onwards" includes all the events after and including the date you're exporting on. And "Custom" allows you to select your own date range. Clicking on the down arrows next the dates opens a drop down calendar where you can make your selection. You can't select the type of events you want to import e.g. only Weekly, Monthly etc.. because this is a Desktop Calendar feature and such information won't be stored in a CSV files (even if it was one made previously with Desktop Calendar). When you're finished, click "Next".
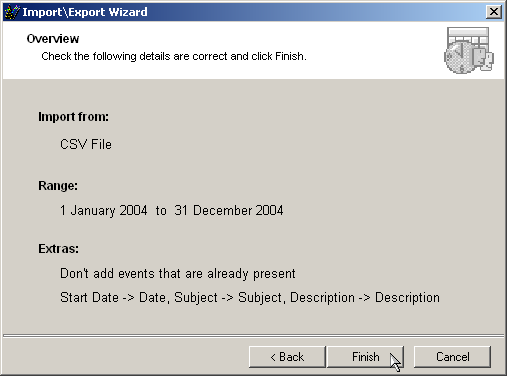
Now just check the details are correct and click "Finish".
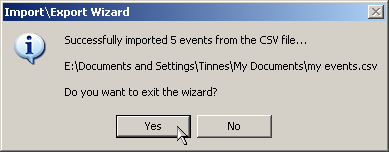
If the operation was successfully the following message should appear telling you how many events were imported.