

 Version
Select which version of the calendar you have
- Desktop Calendar 7
- FAQ
- Walkthrough
- Hotkeys
- Installation
- Desktop Calendar 0.5
- Desktop Calendar 0.4
 Contact
Can't find the answer to your question here? Contact us.
Desktop Calendar 7 Walkthrough
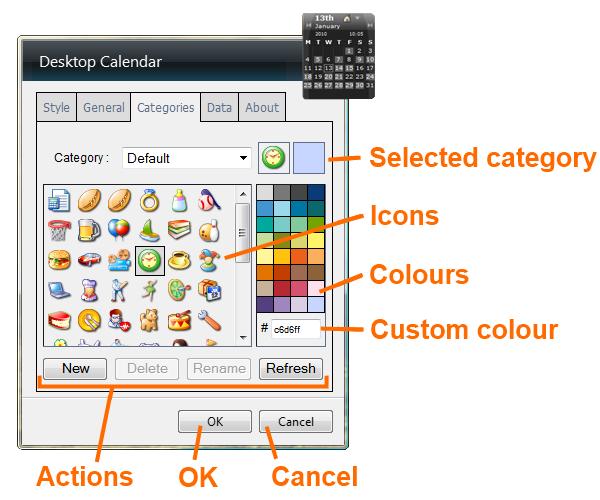
Selected category - Select the category to wish to view/edit from this drop down list. It's currently associated icon and colour will be previewed in the boxes to the right.
Icons - These are all the available icons. To change the icon for the selected category just click on one. A box will appear round the icon to show your selection and the preview will change at the top. Click "OK" to apply it.
Colours - These are preset colours. To change the colour for the selected category, just click on one of the coloured boxes. The new colour will be displayed in the preview box at the top. Click "OK" to apply it.
Custom colour - This field can be used to enter your own colour. It takes a standard "hex colour" (also know as "web colour") which consists of 6 hexadecimal digits.
Actions
- New - Create a new category.
- Delete - Remove the currently selected category.
- Rename - Rename the currently selected category.
- Refresh - Reload the categories if the file has been modified outside the calendar.
OK - Clicking this button will save and apply and changes you've made.
Cancel - Clicking this will dismiss your changes and return you to the calendar.
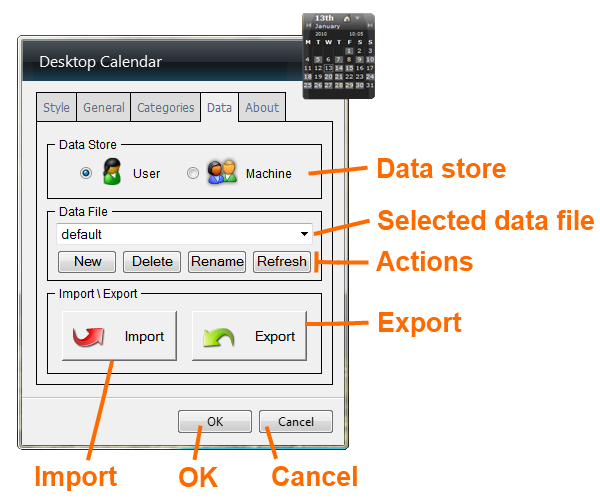
Data store - If the data store is set to "User" the data file will only be accessible to the user who is currently logged in. If it's set to "Machine" the data file is accessible by anyone who logs onto the computer.
Selected data file - This is the data file that is currently active. You can use this drop down to switch to another data file. Only one can be active at a time per calendar, but you can have multiple calendars.
Actions
- New - Create a new data file.
- Delete - Remove the currently selected data file.
- Rename - Rename the currently selected data file.
- Refresh - Reload the list of data files if any files have been added or removed outside the calendar.
Export - Opens the export wizard in order to get data out of the calendar.
Import - Opens the import wizard in order to get data into the calendar.
OK - Clicking this button will save and apply and changes you've made.
Cancel - Clicking this will dismiss your changes and return you to the calendar.